How to Change a Bottleless Water Dispenser Filter
Inline dispenser filters are usually straightforward to replace, but compatibility, flow direction, water isolation, pressure relief and flushing matter. Never assume two cartridges that look alike are interchangeable.
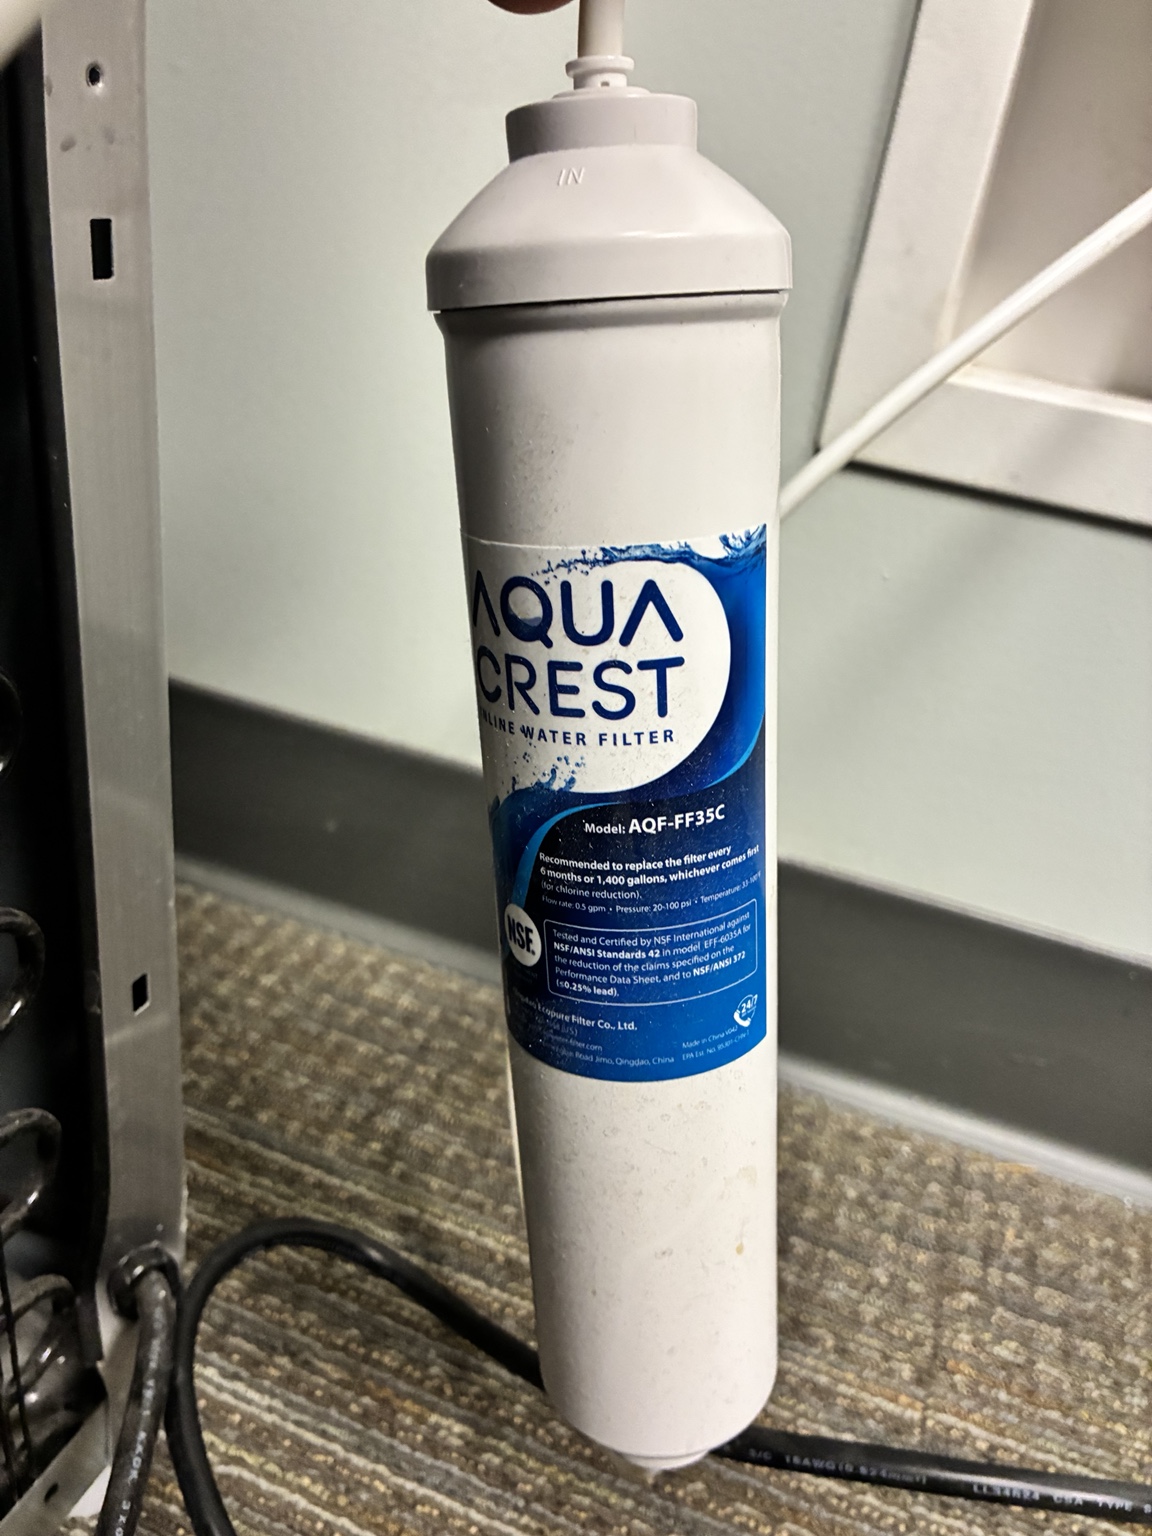
Step-by-step filter change
1. Identify the exact filter
Photograph the existing cartridge label, model number, tubing size and connection style. Verify the replacement is approved/compatible for the dispenser and intended water service.
2. Shut off the water
Close the positively identified supply valve serving the dispenser. Do not force a valve that is stuck or leaking.
3. Relieve pressure
Operate the cold-water dispenser as directed by the manufacturer until flow stops or pressure is relieved. Use a towel or small container because residual water can remain in the cartridge and tubing.
4. Note the flow direction
Before disconnecting anything, photograph the old filter orientation. Find the IN/OUT markings or flow arrow. Installing a directional filter backward can cause poor performance or improper operation.
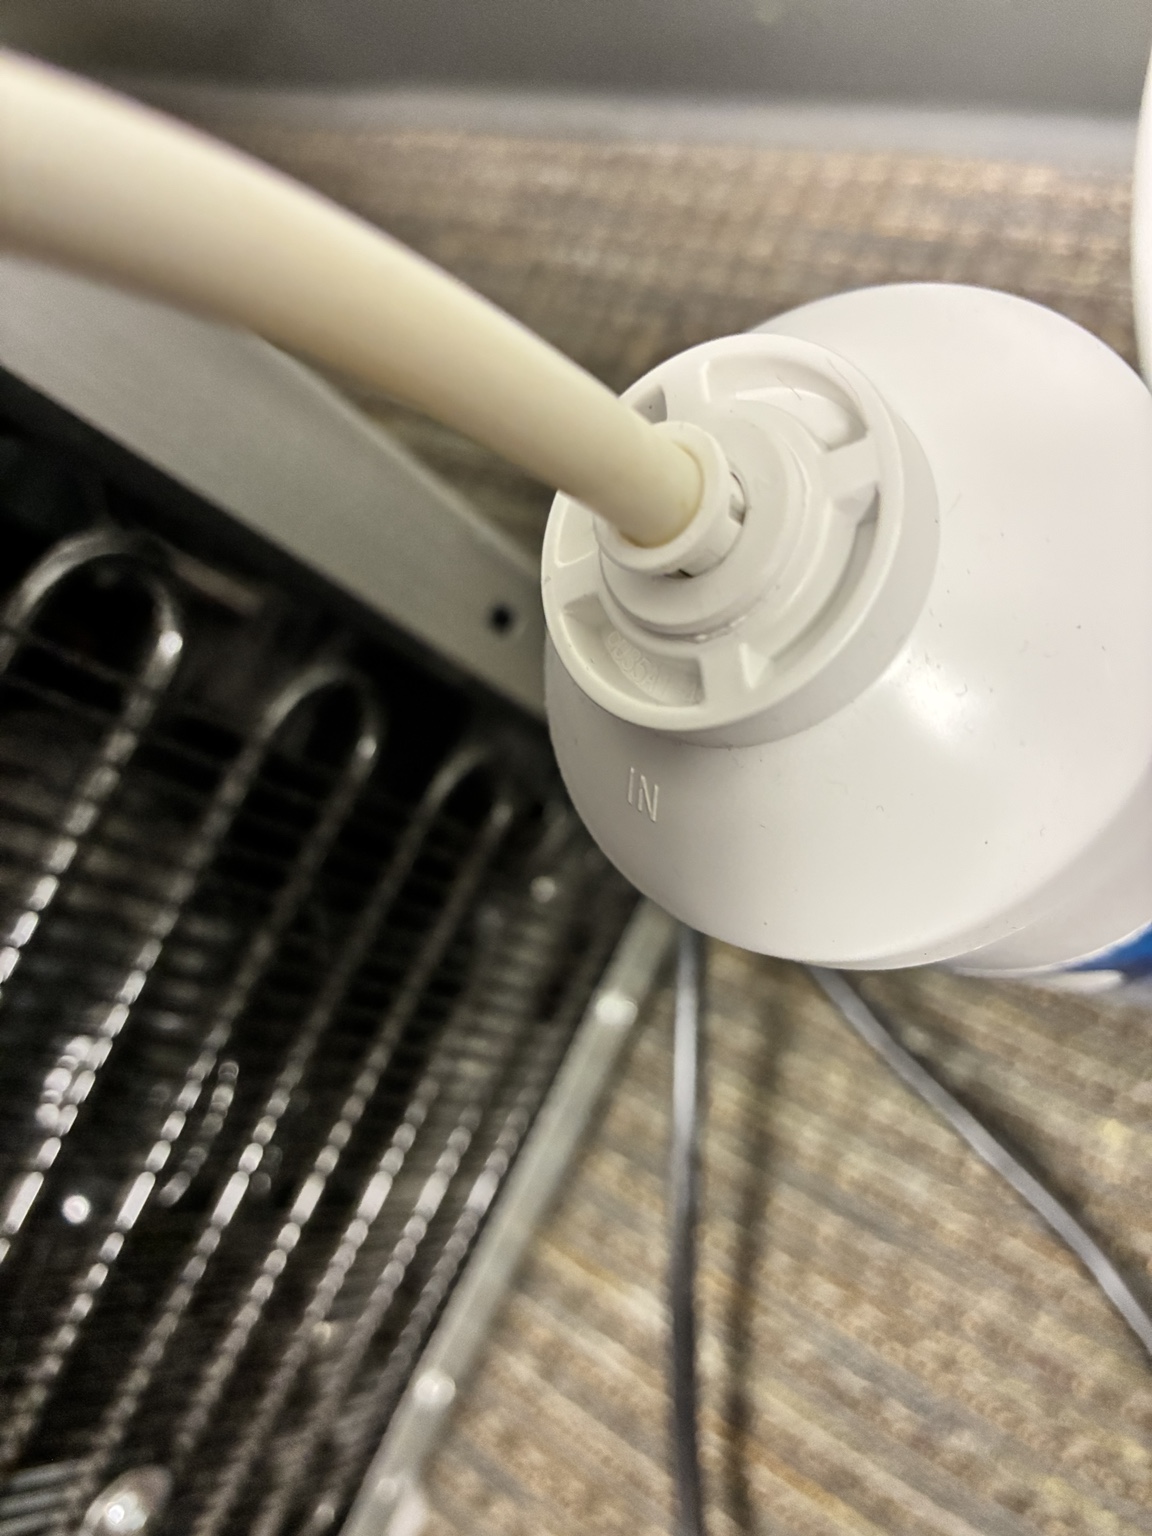
5. Disconnect the tubing correctly
For push-to-connect fittings, follow the fitting/filter instructions: remove any locking clip if present, press the collet evenly, and pull the tubing straight out. Do not yank, twist aggressively or cut tubing unless the manufacturer procedure calls for it.
6. Install the new cartridge
Confirm direction again. Insert tubing fully to the specified depth and reinstall any required retaining clips. Gently tug-test connections if the manufacturer instructs it.
7. Restore water slowly and inspect
Open the supply according to its design while watching every disturbed connection. Stop immediately if a fitting leaks. Do not rely on a dry floor alone—inspect the actual joints.
8. Flush the new filter
Flush the cartridge for the time or volume specified by the filter/dispenser manufacturer. This removes trapped air and manufacturing carbon fines where applicable. Do not invent a universal flush volume.
9. Final leak and function check
Dispense several cycles, verify normal flow/taste/appearance, inspect all connections again, and reset a filter indicator only if the specific dispenser procedure calls for it.
Important hot-water note
When to stop
- You cannot verify filter compatibility or flow direction.
- The shutoff does not hold or begins leaking.
- Tubing is cracked, deeply scored or will not seal in the fitting.
- Water appears inside powered portions of the dispenser.
- The unit still has poor flow or leakage after a correctly installed filter.
PM record
Record the replacement date, filter manufacturer/model, asset/location, technician, and the next replacement interval based on the filter/dispenser instructions and your site's water conditions or usage.
BuildingWrench provides general educational information for commercial-facility maintenance. Manufacturer instructions, applicable codes, site procedures, and required trade qualifications always take priority.